
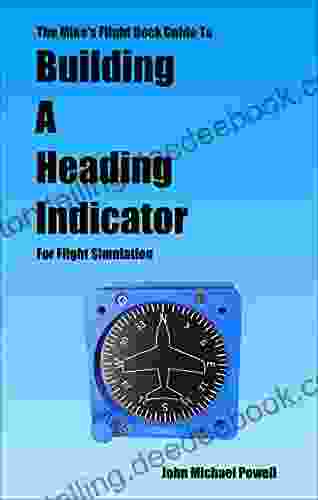
A Comprehensive Guide to Building a Realistic Heading Indicator for Flight Simulation

A heading indicator, also known as a directional gyro (DG),is a critical instrument in aircraft navigation. It provides a reference for the pilot's heading and helps them maintain the desired course. In flight simulation, a realistic heading indicator is essential for creating an immersive and accurate experience.
This article will provide a detailed guide on how to build a realistic heading indicator for flight simulation. We will cover the materials, tools, and step-by-step instructions required to create a functional and visually appealing instrument.
5 out of 5
| Language | : | English |
| File size | : | 7447 KB |
| Screen Reader | : | Supported |
| Print length | : | 74 pages |
| Lending | : | Enabled |
Materials
- 1x 3.5-inch round acrylic sheet
- 1x 3.5-inch round clear plastic sheet
- 1x 2-inch round plastic disc
- 1x 1/4-inch brass or aluminum rod
- 1x 1/8-inch brass or aluminum rod
- 1x 12-volt DC motor
- 1x 12-volt DC power supply
- 1x Potentiometer (10k ohms)
- 1x LED (any color)
- 1x Resistor (1k ohms)
- 1x Wire (22 AWG or similar)
- Black paint
- White paint
Tools
- Drill
- Drill bits (1/4-inch, 1/8-inch, 1/16-inch)
- Saw
- Sandpaper
- Paintbrush
- Soldering iron
- Multimeter
Step-by-Step Instructions
### 1. Prepare the Acrylic Sheet
Start by drilling a 1/4-inch hole in the center of the acrylic sheet. This hole will be used to mount the brass rod later.
Next, use a saw to cut out a circle from the clear plastic sheet. The circle should be slightly smaller than the acrylic sheet so that it can fit inside it.
### 2. Create the Heading Disc
Drill a 1/8-inch hole in the center of the 2-inch plastic disc. This hole will be used to mount the 1/8-inch brass rod later.
Paint the disc white and let it dry.
### 3. Assemble the Rod Assembly
Cut two pieces of 1/4-inch brass rod. One piece should be 2 inches long, and the other should be 3 inches long. Solder the two pieces together at a 90-degree angle.
Cut two pieces of 1/8-inch brass rod. One piece should be 1 inch long, and the other should be 2 inches long. Solder the two pieces together at a 90-degree angle.
Insert the short 1/8-inch brass rod into the hole on the heading disc and solder it in place.
Slide the 1/4-inch brass rod assembly over the 1/8-inch brass rod and secure it with a small screw or nut and bolt.
### 4. Mount the Motor and Potentiometer
Drill two 1/4-inch holes in the acrylic sheet, 1 inch apart. These holes will be used to mount the 12-volt DC motor.
Drill a 1/16-inch hole in the acrylic sheet, 1 inch below the center hole. This hole will be used to mount the potentiometer.
Mount the motor and potentiometer to the acrylic sheet using screws.
### 5. Wire the Circuit
Connect the positive terminal of the motor to the positive terminal of the power supply. Connect the negative terminal of the motor to one end of the potentiometer.
Connect the center terminal of the potentiometer to the positive terminal of the LED. Connect the negative terminal of the LED to a 1k ohm resistor.
Connect the free end of the resistor to the negative terminal of the power supply.
### 6. Calibrate the Heading Indicator
Connect the heading indicator to the power supply and turn it on. Adjust the potentiometer until the heading disc is aligned with the zero mark.
Use a magnetic compass or another heading reference to verify the accuracy of the heading indicator.
### 7. Paint the Heading Indicator
Paint the acrylic sheet black. Let it dry.
Mask off the area around the heading disc and paint the rest of the acrylic sheet white. Let it dry.
Remove the masking tape and your heading indicator is complete.
Building a realistic heading indicator for flight simulation is a rewarding project that can enhance your flying experience. By following the steps in this guide, you can create a functional and visually appealing instrument that will add authenticity to your simulated flights.
With a little patience and effort, you can transform a simple acrylic sheet into a valuable tool for your flight simulation rig.
5 out of 5
| Language | : | English |
| File size | : | 7447 KB |
| Screen Reader | : | Supported |
| Print length | : | 74 pages |
| Lending | : | Enabled |
Do you want to contribute by writing guest posts on this blog?
Please contact us and send us a resume of previous articles that you have written.
 Book
Book Novel
Novel Page
Page Chapter
 Story
Story Genre
Genre Reader
 Magazine
 Newspaper
 Sentence
 Shelf
Shelf Glossary
 Bibliography
 Foreword
 Preface
 Annotation
 Manuscript
 Codex
Codex Narrative
 Autobiography
 Memoir
 Encyclopedia
 Thesaurus
 Narrator
 Character
 Resolution
 Periodicals
 Research
 Lending
 Reserve
 Academic
 Reading Room
 Rare Books
 Literacy
 Thesis
 Dissertation
 Storytelling
 Awards
 Book Club
 Textbooks
 Mitsutoshi Inaba
 Paul Miller
 George Herbert
 Mary Lois Kissell
 Dick Mccaw
 Andrew Hugill
 Margaret Wilkerson Sexton
 David A Sherris
 Fyodor Dostoyevsky
 2011th Edition Kindle Edition
 Nancy Gertner
 Alan Furst
 David Wong
 2012th Edition Kindle Edition
 Simon Shepherd
 Colin Escott
 Charity Phillips
 Massimo Vacchetta
 Deb Buckingham
 Shanda Trofe
Light bulbAdvertise smarter! Our strategic ad space ensures maximum exposure. Reserve your spot today!

 Esteban CoxMy Crazy Alternative Life: Mary Lynn Pulley's Journey from Hollywood to the...


 Kenzaburō ŌeNavigating the Corporate Landscape in a Low Carbon Economy: A Comprehensive...

 John GreenFollow ·11.6k
 Joseph ConradFollow ·4.6k
 Pablo NerudaFollow ·8.2k
 Eliot FosterFollow ·3k
 Garrett PowellFollow ·12k
 Jesse BellFollow ·11.5k
 Fernando BellFollow ·17.5k
 Douglas AdamsFollow ·8.3k

 Howard Blair
Classical Music Themes for Easy Mandolin, Volume One
Classical Music Themes for Easy Mandolin,...

 Paulo Coelho
The Heretic Tomb: Unraveling the Mysteries of a Lost...
Synopsis In Simon Rose's captivating debut...

 Nathaniel Powell
 Rodney Parker
The Passionate Friends Annotated Wells: A Deeper...
Unveiling the...

 Ed Cooper
Delicious Stories of Love, Laughs, Lies, and Limoncello...
In the heart of...

 Elmer Powell
Hal Leonard Piano For Kids Songbook: Unleashing the...
Music holds immense...
5 out of 5
| Language | : | English |
| File size | : | 7447 KB |
| Screen Reader | : | Supported |
| Print length | : | 74 pages |
| Lending | : | Enabled |
